Part 6: Spring 2022 to Present
This page was first published on November 4, 2022
and last updated on February 25, 2023 Page 3 The Traveler's Notebook (a.k.a. Midori) In the past I have been tempted to buy a (Midori) Traveler's Notebook in passport size and use it as a sketchbook that I can carry in the back pocket. I know it was mainly because of all the marketing hype, and have examined these notebooks a few times at local stores here in Tokyo. But I always walked away without buying one. The leather cover is thick and beautiful, but I was not impressed with the stapled inserts or the metal button or the horizontal elastic cord that was anchored with a knot in the middle of the back cover where it would make a bump. In other words, I didn't like anything about the Traveler's Notebook except the leather cover which I absolutely loved. Then one day I went to Tokyo Station on a whim and just bought the passport size Travelers Notebook in camel color. Here is a photo of it taken on the day I bought it, still in a state of peaceful bliss before I started my radical modifications. 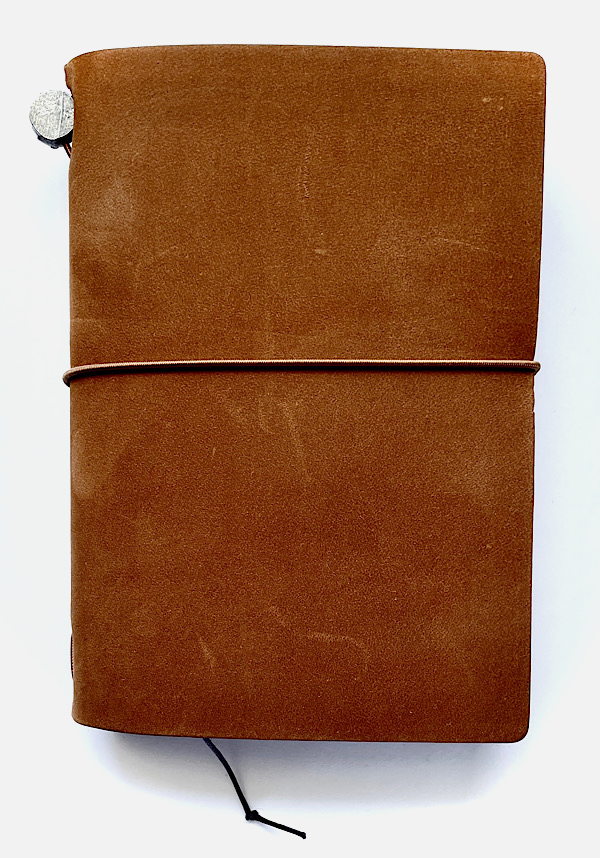
Almost immediately I removed the metal button and rubbed down the leather with mink oil to darken it. I also removed the elastic band from the center of the back cover, and replaced it with a small flat hair band which comes out through a hole I punched in the spine. I also removed the bookmark that was made of cord. 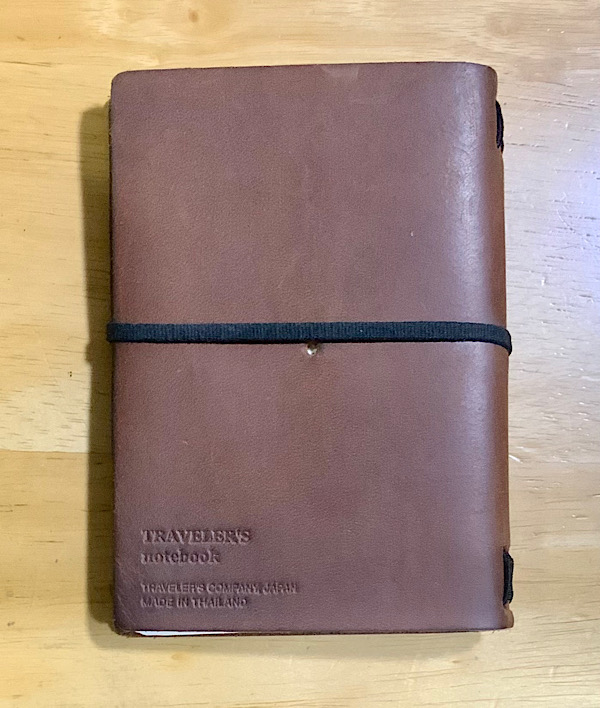
So I took a simple and minimalist notebook and made it even more simple and minimalist. The beauty of such a system is complete customizability. I knew that I could use any sketch paper I wanted, and I didn't have to stick to the standard Traveler's inserts. I punched two additional sets of 2mm holes on either side of the original holes so that I could install two more elastic cords and have three inserts side by side that did not depend on ugly rubber bands holding them together. Long thin elastic cords can be found cheaply. I threaded one long cord through all the holes and tied it together. 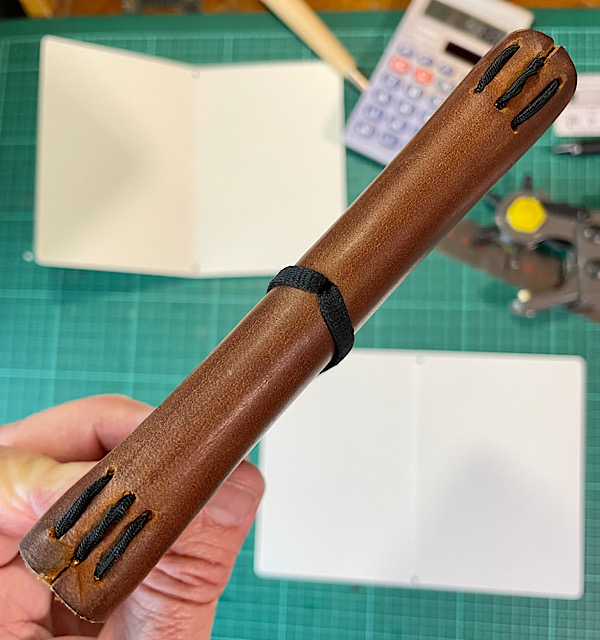
I decided to treat the three inserts as if they were signatures in a traditionally bound book. Signatures are thin bunches of pages held together to form a thicker book. With this concept in mind, I used the exact same watercolor paper for all three inserts. This was to be a dedicated sketchbook and not a multi-purpose notebook. Since my goal was to have a thin and portable sketchbook for the back pocket, I limited each signature to two sheets each. That would give me twelve pages. 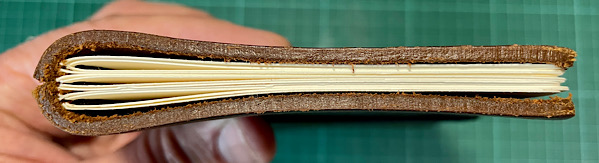
The watercolor paper I chose was Maruman vifArt which is available in smooth, medium or rough textured surfaces. Smooth (a.k.a. Fine) suits my drawing style best. This paper is a bit thick, so two sheets per signature gave the sketchbook the exact thickness I wanted. I drew some plans so I could refer to them in the future. These watercolor pads come in various sizes including A4 and B5. The B5 size will yield two passport size sheets which become four pages, and there is very little wasted paper. By the way, all the images on this page are larger than they appear so you can pinch out to zoom or tap on them to go to the full size image. 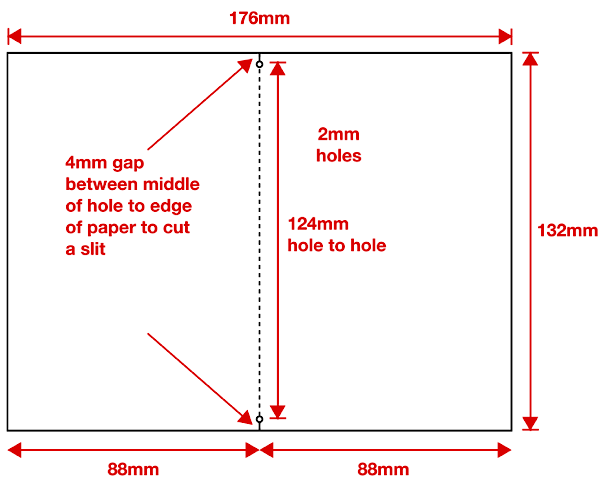
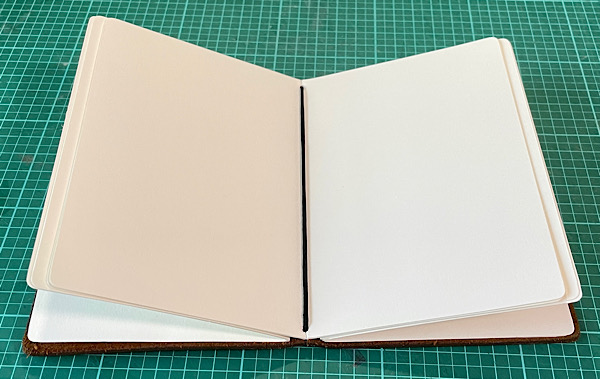
I also decided to keep all the sheets of paper the same uniform width as they are when open flat (176mm). When folded in half, the center pages protrude and appear wider than the outer pages. I could trim the center pages to match the outer pages when folded, but with only two sheets per signature, the center pages only jut out a little, and the disparity in width between pages is minimal. Keeping every sheet the same width will give me the freedom to rearrange pages or replace them without having pages becoming too wide or too narrow when folded in their new position.
The standard Traveler's passport size dimensions are 89mm x 124mm. I made my inserts 88mm x 132mm which is slightly narrower and significantly taller than standard Traveler's inserts. Instead of stapling these pages together, I punched a 2mm hole at the top and bottom with a slit from the hole to the edge of the paper. 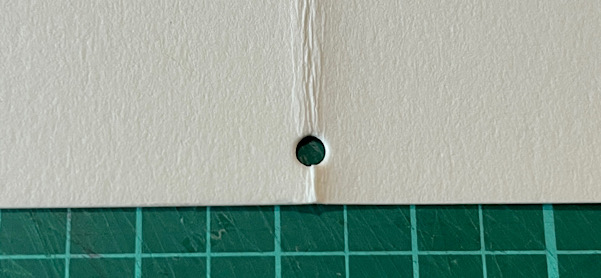
I recommend punching each sheet of paper individually because if you punch holes through several sheets together, you will probably miss the center fold on most of them. I found out the hard way. 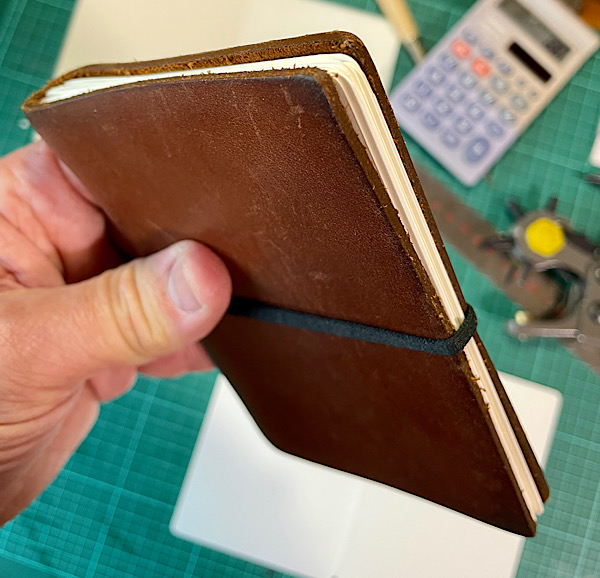
Since the pages are taller than the standard Traveler's insert dimensions, there is less space between the edge of the pages and the cover (like a real book) and the combination of tiny hole and slit at the top and bottom of each pages assures that the elastic band will hold the pages firmly in place. And yet it is very easy to remove pages. Then I got some thick paper which is nearly identical to the paper used for official Traveler's Company folders and made a custom folder to wrap around the three inserts. It has three holes and slits at the top and bottom of the spine to allow the elastic cord to pass through, and I reinforced it with book binding tape so it could withstand the trauma of being inserted into place. 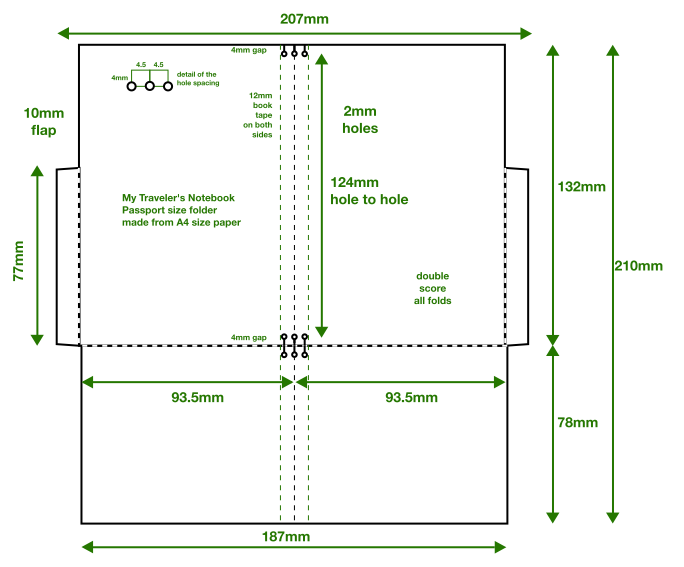
It also has pockets in the front and back to hold things like my smaller card sketches. The folder is practical and gives the notebook a more squared-off book-like shape. 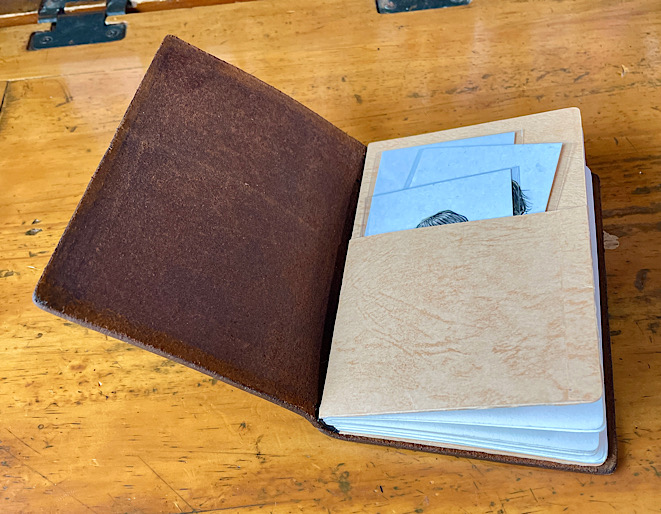
I also rounded all the corners with a round corner punch. Mine has three sizes on one punch, S, M and L. The small size is the closest match to the round corners on the leather cover. After I started carrying this sketchbook in my back pocket, I realized that there was no way it could accidentally open back there, so I removed the horizontal elastic band. 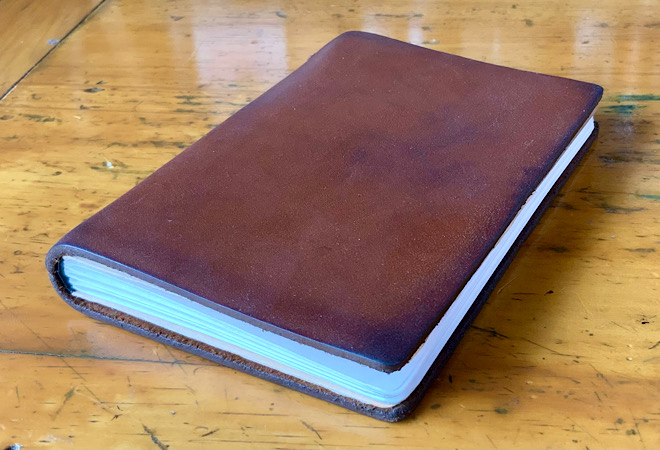
Now that's what I call minimalist! Now I can carry loose sheets of watercolor paper in little sketchbook that goes everywhere in my back pocket. Most pocket sketchbooks on the market are not as slim or flexible as this because they have too many pages. They are also not classy leather. I think Leonardo da Vinci would approve. The Plotter Leather Binder 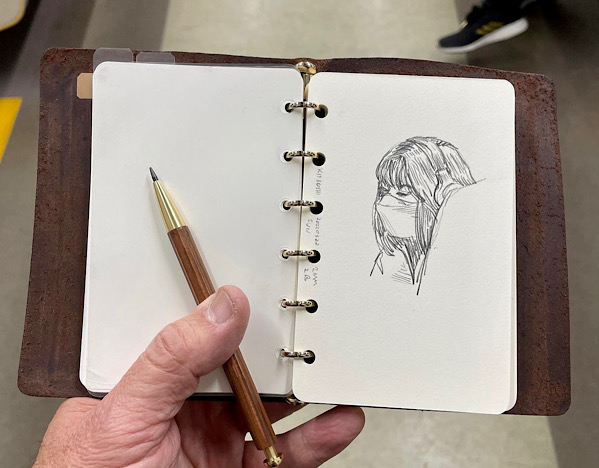
I also have been using my Plotter mini 6 size leather binder as a sketchbook. The Plotter is the ringed cousin of the Traveler's Notebook, and I love the leather on both. Here it is with one of my Kita-boshi pencils. I love wooden mechanical pencils. I had been carrying the Plotter in my back pocket despite the warnings not to do that. I soon learned why: the gold back plate separated from leather and the ring mechanism. Fortunately, the construction is so simple that I could easily fix it with some smooth (no teeth) pliers. But the Plotter no longer travels in my back pocket.
Lately I've been using the Plotter as a journal which I carry in my bag. I'm writing in it with the Traveler's Company brass fountain pen which I have come to really like, more than I had expected. The nib is very smooth, and it is made of one of the three materials I always gravitate towards: wood, leather and brass. I know that there are many, many people out there who share that affinity. Several years ago I moved my journaling to a digital format in a cloud server which can be accessed from any of my devices. But I still love the experience of writing journal entries on nice paper with a fountain pen, so any entries worth saving will be converted by OCR to a digital format and added to my journal in the cloud where they can be found by word searches in the future. More incentive to write neatly. My OCR app of choice is Google KEEP. Note about Amazon links: If you click on a link and buy something at Amazon, a few pennies per dollar goes into my Amazon account, so instead of letting Amazon keep it all, you can pry a few pennies from their fingers make them share it with me. Any other vendor links I may put on this website are just for your convenience. |

Next page >>