|
Digital sketching -- yet again!
Like many artists, I've had a love-hate relationship with digital art.
Back in the early nineties I first tried my hand at digital drawing with a desktop "Power Mac" and a huge Wacom tablet.
I did a few of my Rice Ball Guy stories digitally, and had no trouble switching to digital drawing.
But Rice Ball Guy was a comic, and was characterized by bright flat colors and bold ink lines. It's easy to produce a comic with digital tools and get that traditional comic look, but sketching is a different story.
At the time, computers were heavy and bulky, so the idea of going out to sketch with a computer and Wacom tablet was unthinkable.
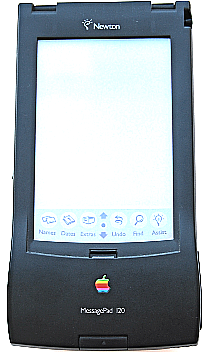
A few years later I tried sketching on an Apple Newton MessagePad 120 with a program called NewtPaint but that was very clumsy, and of course there was no color.
Later I tried to sketch digitally on location with a Nintendo DS Lite, which was possible, but the screen was so tiny, the colors were flat, and the results looked, well, digital.
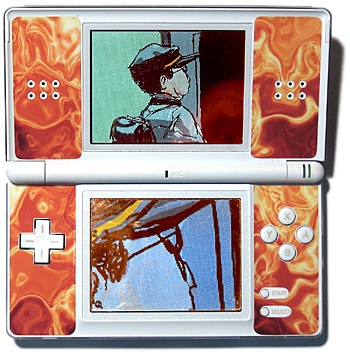 Nintendo DS Lite
Then in 2010 Apple came out with the iPad, and soon other companies were producing Android tablets.
I opted for a less expensive Android tablet. I got a Samsung Galaxy Tab A 10.1 with S-pen. Finally I could sketch digitally on location!
I found digital drawing and sketching very convenient and versatile; I could fix mistakes easily and draw different elements on different layers. Also, there was no need to carry brushes and paint and water, etc. So I could sketch in more places.
And it was so easy to share my work on the internet since there was nothing to photograph or scan. My scans and photos of sketches often turn out blurry and a bit pink, so this was a big improvement.
As I had discovered way back in the beginning, digital tools can mimic ink drawing very well. It also saved my back and neck since I could zoom in rather than hunch over with high powered spectacles to draw tiny details and hatching.
Digital ink drawing is especially good with vector drawing apps such as Infinite Design because it preserves a crisp image regardless of the size. As I like to say, you can blow up your drawing to the size of a house and it looks exactly the same.

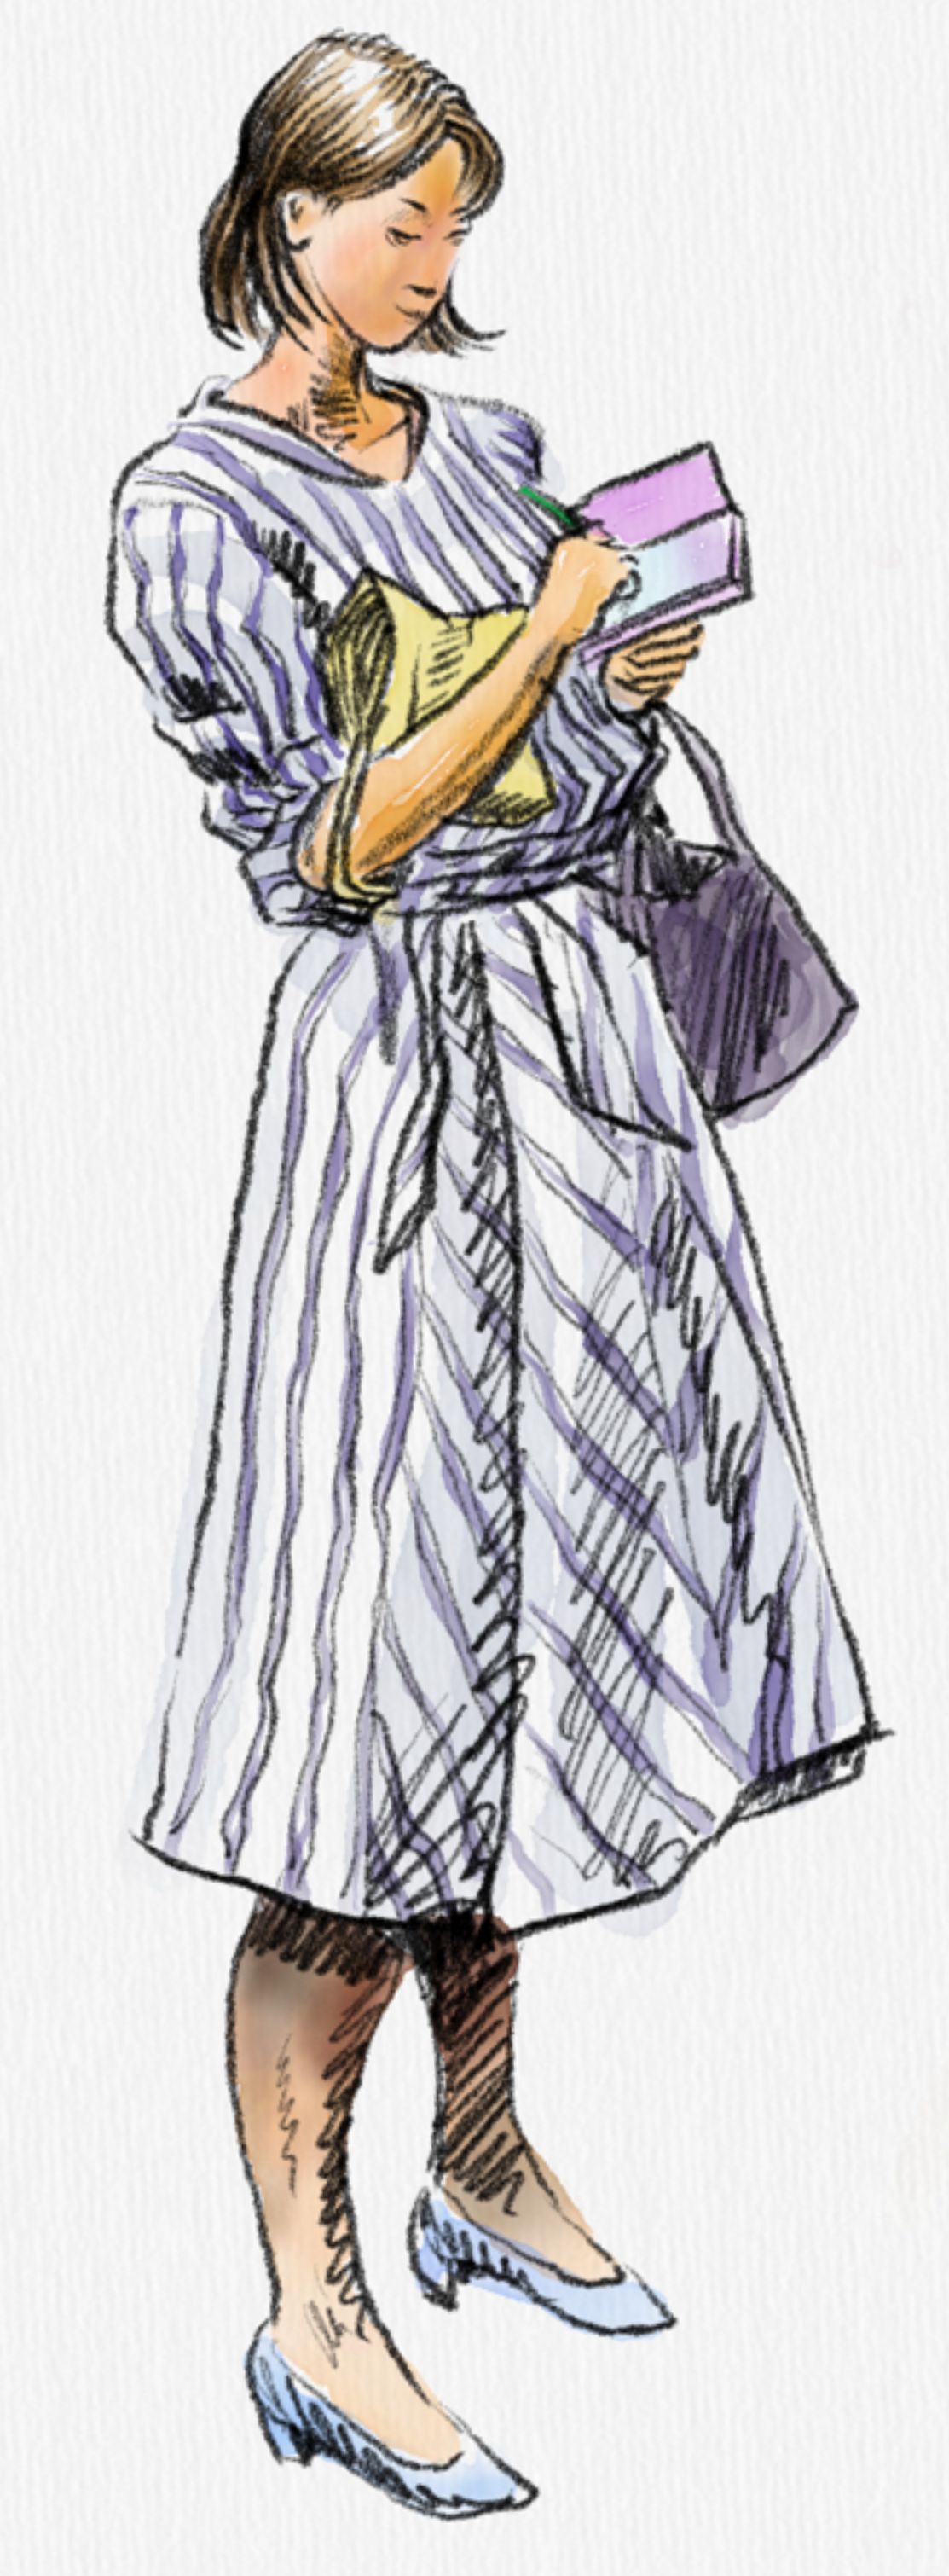
Digital ink drawing produced with Infinite Design
|
Also, digital drawing programs can help you draw even better ink lines than you could naturally because you can get streamlined strokes that eliminate bumps and inconsistencies. I didn't know about that feature when I made the drawing above.
But I found digital sketching less than satisfying compared to digital ink drawing, and all the apps I tried basically gave the same results.
The pencil and watercolor tools didn't resemble their real-life counterparts. Digital watercolor in particular was very limited and had a digital flat appearance.
I'm accustomed to letting colors mix together right on the paper and letting them flow together.
But in most digital drawing apps you have to find the right color on the palette and not even think of mixing it on the painting itself. When you want to get a certain shade of a color, you can only get it by nudging the color in the direction of neighboring colors on the digital color wheel.
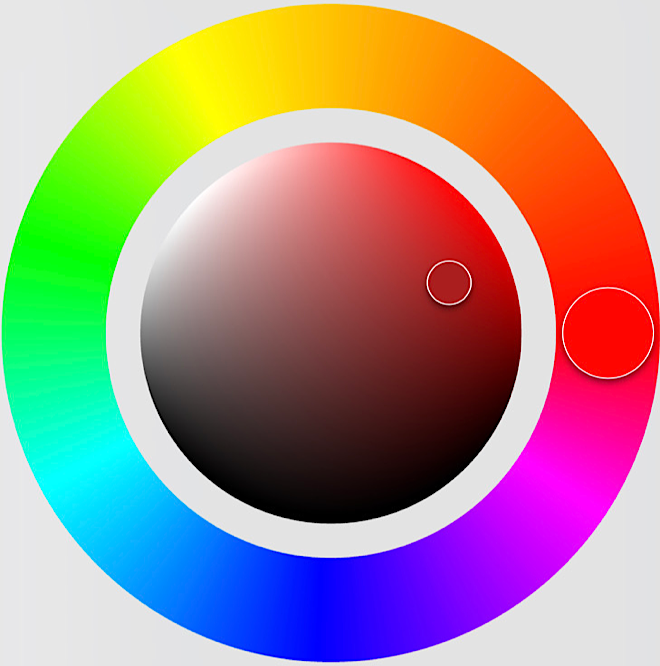
You can only change the value by nudging the color towards the black or white areas, and you can only change the saturation by nudging the color towards fully saturated or no color at all (grays only), so the colors in shade can lack depth and vibrancy that a traditional method could acheive by mixing in complementary colors rather than black or gray.
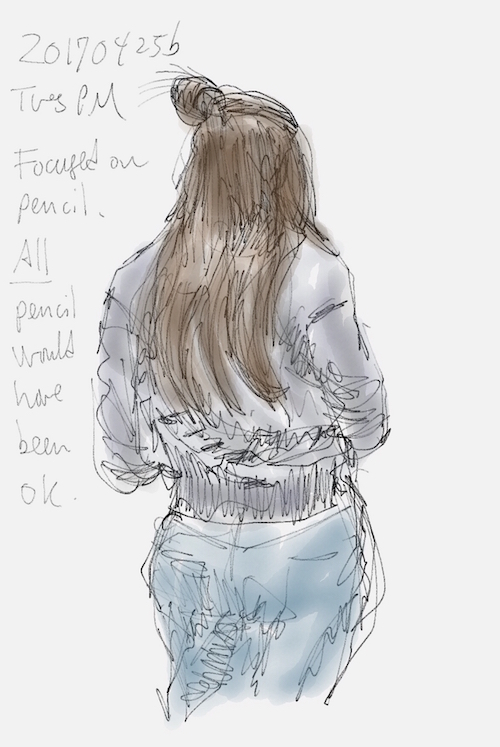
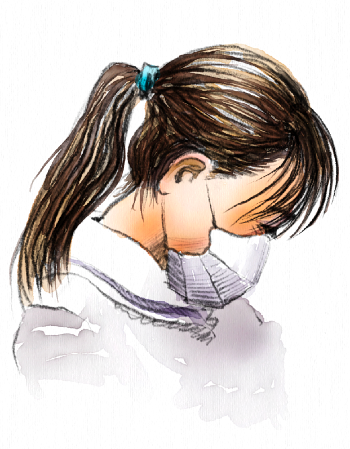
Digital watercolor sketch produced with Samsung Notes. Maybe not bad, but not my preferred style.
|
But my dissatisfaction with digital colors was limited to sketching in a transparent watercolor style. For color illustrations with opaque colors, the tablet was great, and I preferred using my Samsung Tablet A and S-pen for making illustrations while sitting at my desk, and I continued to use it for that purpose.
However, I soon realized that the Samsung Tab A was a bit bulky and heavy for on-the-spot sketching while standing, which is what I do in the classroom and on the train. It made my arm very tired and I worried I might damage my arm or wrist. So eventually I went back to my pencil and jotter and ring binder notebook which have been described in previous pages.
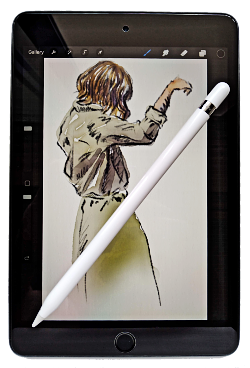
Enter the iPad Mini
Then a few years later, I decided to give digital sketching another try. Because I have been sketching these past several years almost exclusively in a small portable sketchbook or on index cards in a pocket size jotter, I determined to get the smallest, most portable tablet I could find that worked with an active stylus. Then perhaps I could be free to sketch digitally wherever I wanted, even while standing on the subway or in the classroom.
I researched the web and found only two small tablets that used active styluses: the current Samsung Galaxy Tab A 8.0" with S Pen or an iPad Mini 5 or an iPad Mini 5 with Apple Pencil with Apple Pencil which cost about twice as much as the Galaxy (and that S pen was already included in the price of the Galaxy Tab!). Thanks to a special gift I had the money to buy either one, so I decided on the iPad Mini 5. Apparently this was the first iPad Mini that works with an Apple pencil. which cost about twice as much as the Galaxy (and that S pen was already included in the price of the Galaxy Tab!). Thanks to a special gift I had the money to buy either one, so I decided on the iPad Mini 5. Apparently this was the first iPad Mini that works with an Apple pencil.
Had it been money from my own pocket and not a gift, I would have gone with the much less expensive Samsung Galaxy Tab.
I spent the next few weeks learning the iPad OS and trying all the free drawing apps I could find in the Apple store with the intention of buying the premium version of the app which suited me best. I experimented with MediBang, Autodesk SketchBook, Adobe Photoshop Sketch, Tayasui Sketches and Procreate (and a bunch of note taking apps which were not primarily drawing apps)
I found that the most natural expressive pencil lines could be made with an app called Procreate. These pencil tools got nice line width variation with pressure, which is very important to me.
But like most drawing apps I had tried, I couldn't mix Procreate's watercolors on the sketch itself, and couldn't add dashes of complementary colors to the mix while wet.
The best watercolor effects were in a different app called Tayasui Sketches which actually keeps the watercolors wet until you decide to dry them, so you can add different colors to the "soup" as much as you like because it won't dry up until you decide by touching a red icon that looks like a paint drop.
When the watercolor dries, you can see how the different colors interacted, which is often surprising, just like real watercolors where accidents are a big part of the watercolor experience.
These accidents are a positive thing, and give the impression that the work was done with real watercolors instead of digitally. Tayasui did an amazing job of reproducing traditional watercolors right down to the unpredictable nature of the medium.
Tayasui Sketches also lets you mix any two colors you want to make a third color, regardless of their position on the color wheel. So now I could play with complementary colors again.
Tayasui Sketches has a very simple interface so you can focus on sketching.
Another nice thing about Tayasui Sketches is the addition of paper textures for a realistc feel. Of course, you can get that paper texture effect easily in other drawing apps such as Procreate by putting a paper texture image in the top layer and setting that layer's blending mode to multiply. All you need to do is find a paper texture image you like.
Of all the drawing apps I tried, only these two apps, Procreate and Tayasui Sketches were able to produce the kind of sketches I wanted. I bought the premium versions of both since they are incredibly cheap.
The iPad Mini has turned out to be a great choice, both in its portable size and with the great sketching apps which are available.
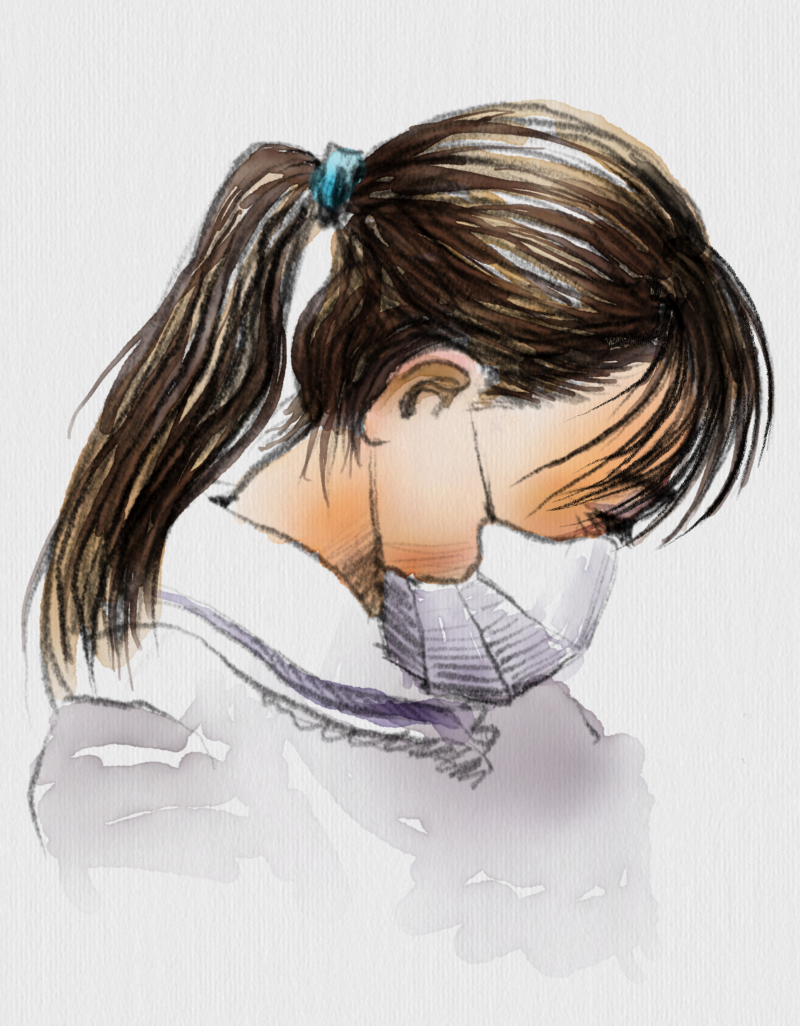
In this section I included some of my first attempts with these two apps on the iPad Mini 5. I did these during summer break of 2020 during the COVID19 pandemic when all Tokyoites were requested to stay home and not go outside.
Rather than sketch directly from live models, I took some of my recent pencil sketches which I had made on the train (maybe you recognize them from previous pages) and photographed them with the tablet camera so I could use them as a basis for new pencil sketches. I did these new pencil sketches in Procreate because I prefer their pencil; it just looks more natural. I then exported the sketches to Tayasui Sketches for the watercolors which are better than Procreate.
This sketching style is exactly what I have been trying to get these past several months with my traditional sketch tools. I'm finally getting light, airy watercolors and loose, lively pencil lines instead of my heavy, overworked watercolors. From now on I can refine my style with even brighter colors and darker pencil lines.
I can even resize and crop the images and upload to them to my web server and edit the HTML files -- all on my iPad Mini and a cheap portable keyboard.
A challenge
These first attempts at digital sketching on the iPad Mini with Apple pencil turned out better than I had hoped for. Of course, they were actually traced from pencil sketches.
But after summer break ended, I tried to sketch with the Apple pencil directly from live models, and the results were not what I had expected.
Digital tools made me lazy and I scribbled carelessly because there was no fear of wasting paper. This resulted in lively gesture drawings instead of carefully rendered sketches.
Then it hit me that this could be a good thing.
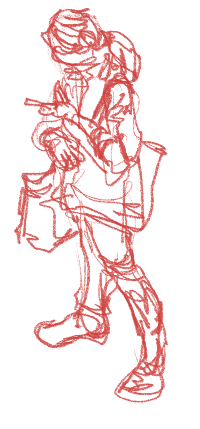
On the iPad, I could simply keep the lively scribbled sketch on the bottom layer as an underdrawing and trace over it with a pencil tool on a separate layer. I could benefit from those hastily drawn strokes.
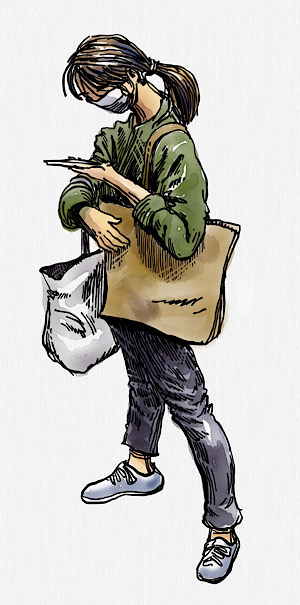
In art school, I had learned the traditional process of making underdrawings with a non-photo blue pencil. But since no photography is involved here, there is no reason to choose non-photo blue unless I simply prefer it.
I chose the old Japanese tradition of making the underdrawing in red. Red ink has always been a useful alternative to black sumi ink for things such as correcting student papers and making underdrawings. The underdrawing can be done on a separate sheet of paper.
For me, red is easier to see, and provides great contrast with black.

|
|
Even if I use black for the underdrawing, I can transform the black lines into red lines by clicking "alpha lock" on the layer and painting over the drawing with a broad brush in red.
Then I could lower the layer opacity and make it barely visible to distinguish it from the main drawing which I would do in black. The effect is the same as overlaying a sheet of vellum paper.
The coloring could then be done on a new layer under the black pencil drawing layer -- or in a different app.
As mentioned above, I was making the pencil drawing with Procreate's expressive pencil lines and then exporting the sketch as a png to take advantage of Tayasui Sketches' amazing watercolors.
If I went with a different drawing medium other than pencil, I could just use Tayasui Sketches for the entire process.
For example, I could sketch in ink and watercolor. Most drawing apps can imitate ink lines pretty well.
Two Tayasui tools in particular worked out well with my ink sketching style: the Ink tool (the icon looks like a fountain pen) and the Acrylic tool. Both gave a bit of random line variation to keep the lines lively.
The two sketches below were done on separate layers of the same sketch, so they use the same watercolor layer.
Tayasui Sketches
Ink pen
|
Tayasui Sketches
Acrylic brush tool
|
But these days I really prefer sketching in pencil for its versatility both in line width variation and in the variation of values (light or dark) depending on how hard you press the pencil, so I'm leaning towards Procreate.
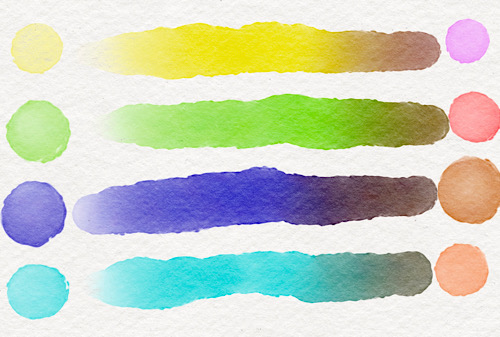
One nice thing about Procreate is that you can tweak the brushes or even make new brushes. So I created a watercolor brush that can change color as you use it. When you tilt the Apple Pencil, the color will shift to the secondary color you've set in the color wheel. I tweaked these brushes specifically with complimentary colors in mind, so the secondary color will darken and intensify enough to darken the main color, but will not go all the way to become that secondary color.
I did this by going into the Brush Studio and then into color dynamics. In the Color tilt section I set Saturation to 50%, Brightness to -100%, and Secondary color to 50%.
In the image below, I made large strokes with my Procreate custom brush from left to right, tilting the Apple Pencil as I went.
So I've fixed the biggest gripe I had about Procreate watercolors, namely not being able to darken colors by adding complimentary colors while the mix is wet! Tayasui Sketches watercolor effects are still better and more natural looking, but I can live with Procreate's watercolors now that I have these custom brushes.
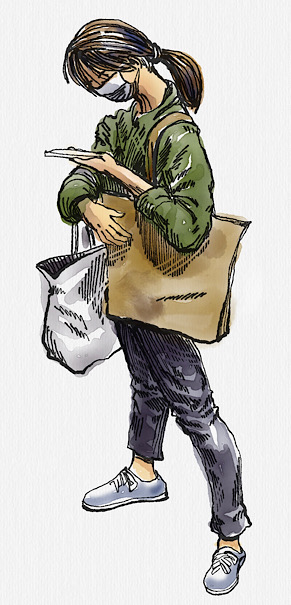
The sketch on the left was done in Tayasui Sketches using their pencil and watercolors and the one on the right was done in Procreate using their pencil with my new color-shifting brush. Sorry; I didn't exploit the color-shifting as much as I could have. Both sketches were done on the iPad Mini.
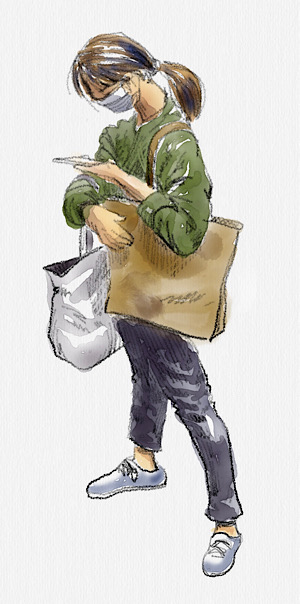
Tayasui Sketches |
Procreate |
I think this new brush is a game changer. Now Procreate gets both expressive pencil lines and decent watercolor effects. So I'm definitely leaning towards Procreate for its customizability, although other sketchers might well lean towards Tayasui Sketches for its simplicity and amazing watercolors.
The next page will show how digital sketching is having a dramatic effect on my style.
Note about Amazon links: If you click on a link and buy something at Amazon, a few pennies per dollar goes into my Amazon account, so instead of letting Amazon keep it all, you can pry a few pennies from their fingers make them share it with me. Any other vendor links I may put on this website are just for your convenience.
|
