Pendulum swings back to analog
I have talked about concept of the pendulum in the life of a sketcher many times on this web site, how our art-related interests never go away for good; they just swing in and out like a pendulum. Well, here I go again.
I have been sketching digitally on my iPads for over a year now, and have been happy with the results. But a comment I received earlier this year started the pendulum swinging back towards sketching on paper again.
I was talking with one of my former students who had graduated, and she mentioned how much she preferred my paper sketches over digital sketches. Then she pulled out the small sketch I had made of her a few years before on a small card, which she always carried in her notebook. For her it was a treasure.
Sketching had become a way share part of my life with my students, and it was such a joy to see some of them carrying these sketches with them. Now I realized these sketches could be a treasure to be cherished beyond their school days.
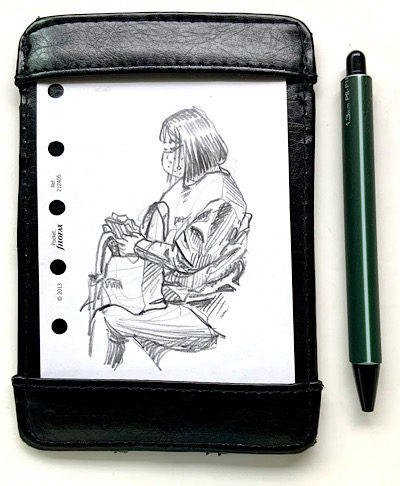
After a bit of research, I discovered mini thermal printers that print directly from a tablet or phone. They only make black and white images on shiny receipt paper, but the images are crisp and could almost pass for an original black and white sketch. These mini thermal printers are very small and simple, require no ink refills, connect to your phone or tablet via Bluetooth, and seemed like a fun idea.
So I got one and started giving students small copies of the digital sketches. The idea worked very well and the students were happy.
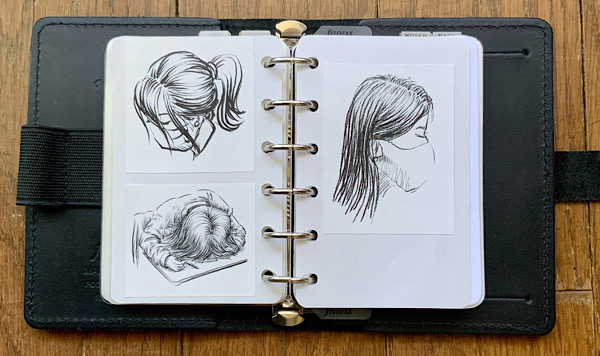
After I started accumulating all these loose sketch printouts, I needed a way to keep them organized and ready to display. A ring binder would be perfect for this.
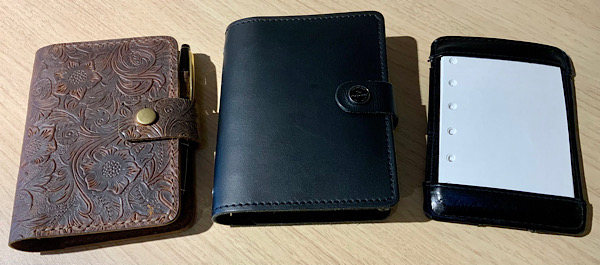
I have a few Ray May DaVinci pocket ring binders which have appeared on these web pages a few times in the past, but they don't hold many pages because the rings are small so they can fit in a pocket. So I decided to get a ring binder with larger rings so I could stuff it with more sketches as well as notes, data and my calendar.
My only criteria besides larger rings was that I wanted to continue to use my preferred 6-ring mini binder format which I had used for a few decades. For me that has always been the perfect portable size.
In Japanese this size is called MINI ROKU which means "mini six" and the 5-ring binders are MINI GO for "mini five." But most ring binder makers in the west call this pocket size. They reserve the name mini for even smaller 5-ring binders.
I discovered the best binder for my needs which I could pick up locally was a thick leather
Filofax Original Pocket Organizer. I liked its simplicity and durability, and wasn't interested in fancy planners with pockets and zippers.
My idea of printing digital sketches for giving them to the students and also storing them in a binder worked very well.
Ironically, having such a nice thick leather ring binder started the pendulum swinging back towards sketching with pencil and paper.
For me that also would also mean sketching in a jotter because this Filofax is thicker and heavier than my slim Japanese binders, and I would rather write or draw in the jotter, and then move the pages to the binder.
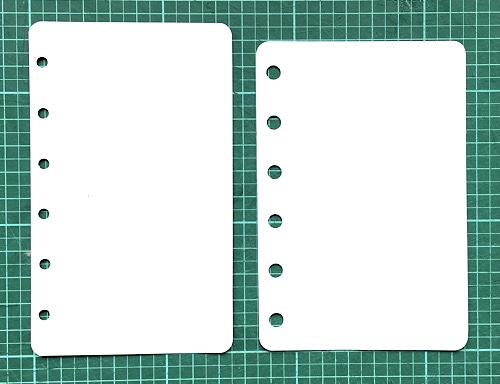
I discovered that Filofax pocket size pages are just a little wider and shorter than standard 3x5 inch format used in Japanese ring binders.
My slim brown leather jotter was too narrow for the Filofax paper, but I discovered to my joy that my old and worn Oxford At-Hand Note Card Case fit these Filofax pages perfectly.
I could simply ignore the Filofax standard and go with the slimmer page dimensions I was accustomed to, but I discovered that actually preferred the Filofax ratio; It was more aesthetically pleasing, and less restrictive.
In the photo above a Japanese page is on the left and the Filofax page is on the right. The holes are spaced apart exactly the same (19mm from the centers) although the Filofax pages have larger holes to accomodate larger rings. My sample has even slightly larger holes than the Filofax standard size because I punched them myself, but I prefer larger holes for easier page turning.
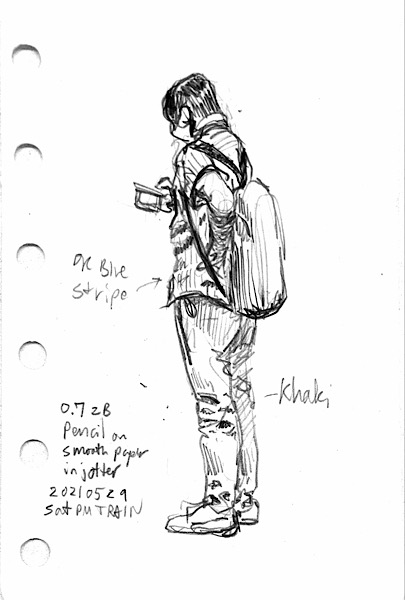
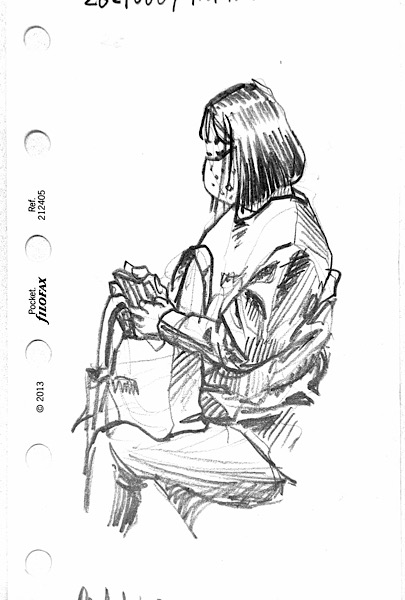
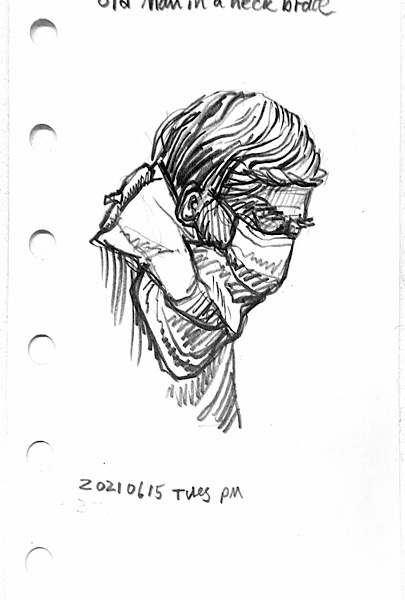
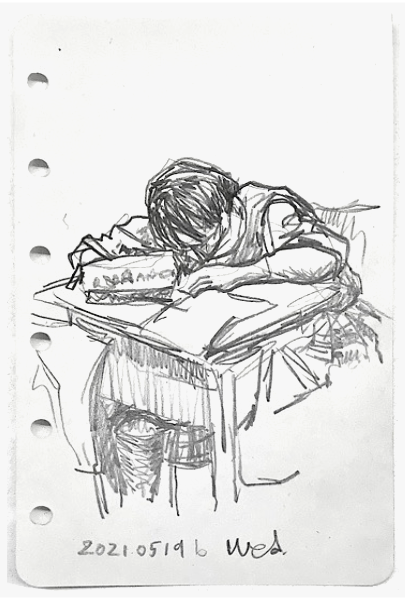
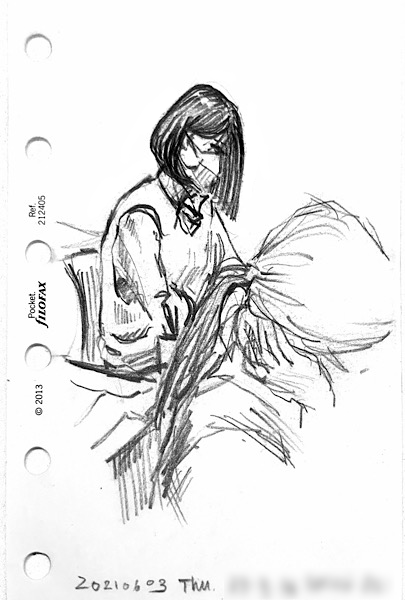
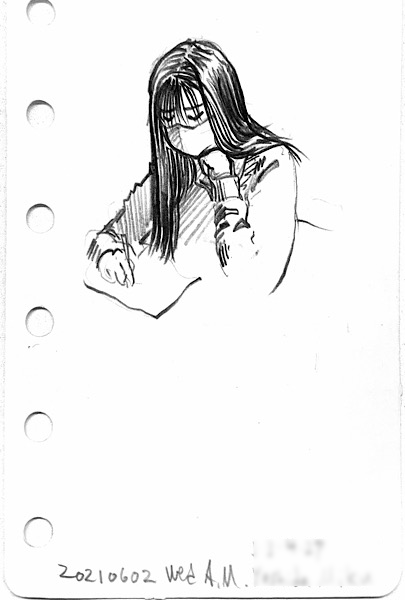
Here are a few subway commuter sketches drawn with a pencil in my jotter and kept in my Filofax.
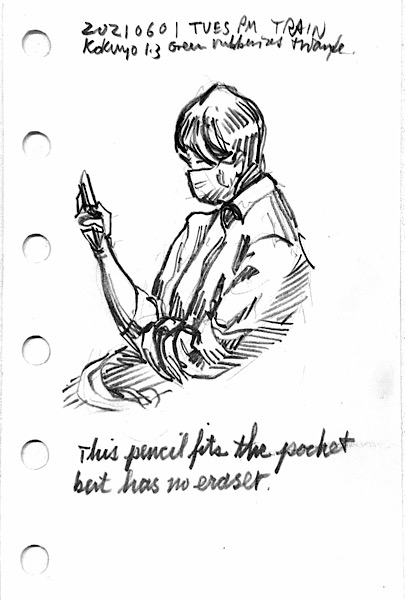
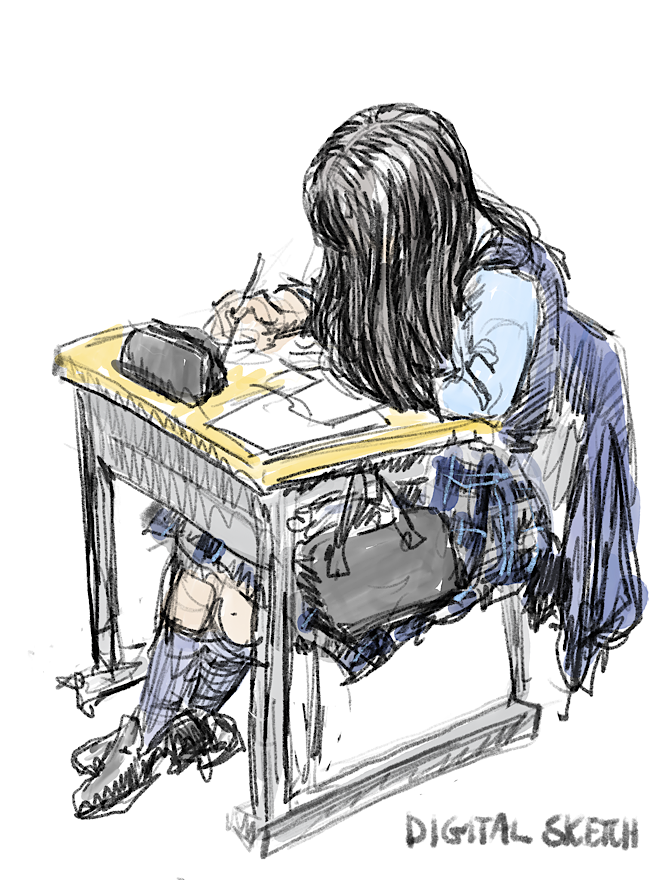
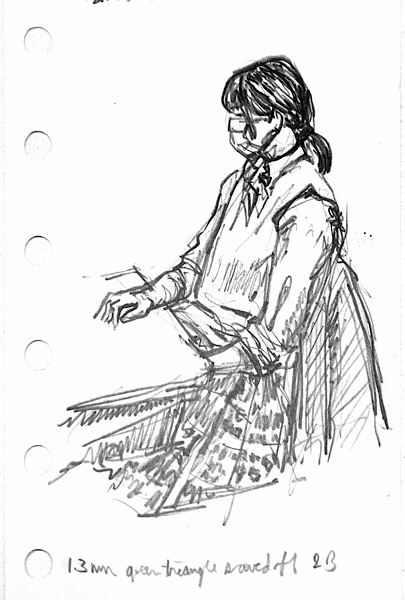
Here are a few sketches from the classroom which were either drawn digitally on my iPad Mini or on paper in my jotter and kept in my Filofax.
The sketches which were were done on paper were scanned into the iPad where they were colored digitally and the color versions uploaded to my special web page mentioned above.
I used an app called Scanner Mini for the scanning.
I also upload the sketches to my Instagram page as well.
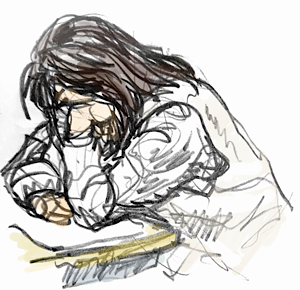
This first sketch was digital from the beginning.
Thoroughly enjoying graphite pencil sketching again, I was clearly on a slippery slope.
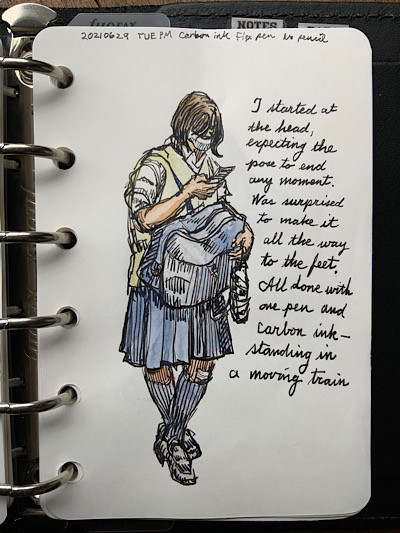
It was inevitable that I would give ink sketching another go. For me, sketching in ink requires a different approach from pencil sketching.
With a pencil, I normally make a quick light outline of the entire subject, and then go in and start adding more details in subsequent passes until the model vanishes or is blocked from view by another commuter.
But this way of sketching doesn't work as well with pen and ink, so I started at the head and brought it to completion before moving on to the next part, constantly checking the proportions and relationships as I went along.
This way, when the subject vanished and the sketch came to an end, I would still have a completed drawing of something even if it was just the head. If the pose shifts after I have started, I can decide if the parts I've drawn will still work with the new pose, or if I should just end the sketch.

This time I had an unobstructed view of the model long enough to finish the sketch, and she didn't move much for the duration of the sketch. And I was happy with the results. I colored it later at my desk.
The paper is Kokuyo Campus Sarasara notebook refill paper which I have cut down to Filofax pocket size (81mm X 120mm) and punched holes. It is very smooth paper (sarasara means smooth in Japanese) which is great for pencil and ink, but a little thin, and not suitable for watercolors other than a very light wash. Anything heavier will buckle the paper.
I did my next few classroom sketches with a fountain pen, using that same method of finishing one part before going on to the next. As usual I sketched in a jotter while standing, and colored them later at a desk.
The last sketch was done on Stillman & Birn Alpha paper which is fantastic for line and wash. I took a few sheets and cut them down to the right size and punched holes. It feels so good to sketch on great paper. I just have to resist the temptation to go overboard with the watercolor and overpower the ink lines, which I have a tendency to do if I'm not careful.
Both the pencil and pen sketches were scanned into the iPad and had their coloring on a separate layer so I could print the line art without color on the thermal printer and give copies to the models. I also added a QR code so they could download the color version later.
The paper trimmer is a cheap one I got at the Japan equivalent of a dollar store. It cost about 500 yen which is close to five dollars. The round corner punch is real nice and I use it for my Filofax filler pages, but after a few sketches I decided it wasn't worth the trouble for all those little thermal prints.
I'm happy to be using watercolors again. As convenient as digital color is, there's something to be said for the experience of doing it the traditional way. It's more gratifying, at least for me.
The advantage of ring binder sketchbooks
When I was young, my inspiration to take up sketching was the notebooks of Leonardo da Vinci. Less than twenty of his paintings exist today, but around fifty of his notebooks have survived, and it is said that he filled up to 28,000 pages in his life time. He carried a small notebook on his belt and sketched and wrote notes in it constantly, and advised other artists to do the same.
The idea of sketching in a book is very appealing to artists, and I have filled many hardbound sketchbooks, especially Moleskines. However, the reality of sketching in a book, especially a hardbound book is inescapable; it is awkward. You don't have the freedom of movement, and if you mess up a page, you have to live with it and tell folks to quickly flip past those pages to the better ones. And since your best sketches are scattered among the growing collection of sketchbooks on your bookshelf, you can't find them very easily.
While Leonard may have sketched rough ideas in a tiny notebook he kept on his belt, there is evidence that his larger notebooks started out as sketches on loose paper which were later bound into a book. Some of the writing and drawings are actually in the center margins, and cross over onto the facing pages.
I have pretty much stopped writing and sketching directly in a book, and have switched to sketching on looseleaf pages which I then store in a ring binder. Actually, when I'm not sketching at a desk (which is most of the time) I sketch in my jotter which stays in the back pocket. It has the convenience and portability of the tiny notebook Leonardo carried on his belt.
 Two of my current notebooks a.k.a. pocket ring binders, plus my jotter
I know hardbound sketchbooks are so classy and traditional; so artsy. But the huge advantage of ring binders can be summed up in one word: freedom (a concept which most artists love above all else).
With a ring binder you are free to move pages in and out and re-arrange them. You can simply remove that failed sketch page without ruining your sketchbook. And you can keep your best or most recent work in the notebook, and move older and not-so-good stuff to storage notebooks that can be found cheaply, or even boxes.
With a ring binder, you could keep one main sketch book and other secondary sketchbooks (or boxes) for storage. With these secondary sketchbooks you can still keep your sketches in chronological order just like hardbound sketchbooks. In your main sketchbook, the sketches can be arranged any way you like. I recommend writing the date somewhere on each sketch so you can eventually store it in its proper chronological order.
One argument against ring binders as sketchbooks is simply the asthetics; they can look tacky and cheap compared to nice hardbound sketchbooks. But there are classy looking ring binders out there as well. Since the ring binder could become your main sketchbook, this is a strong incentive to get a real nice one that you can be proud of, which will last for a long time.
The slider nudges back towards digital: hybrid sketches
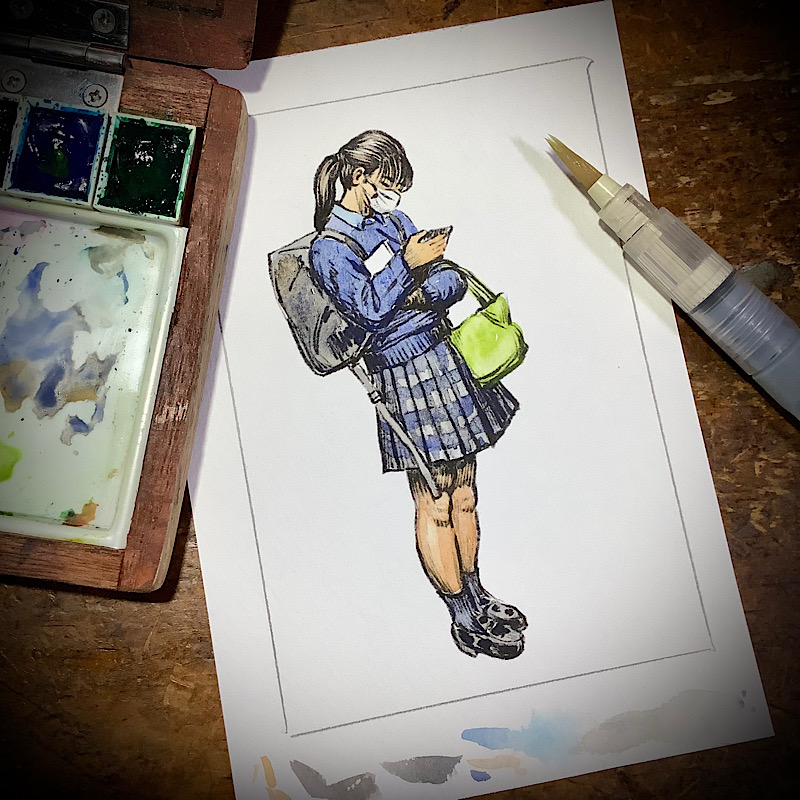
I discovered that I am able to feed watercolor postcards through my cheap inkjet printer. Mine is an old bottom-of-the-line Epson which was the cheapest I could find at the time. The thicker postcards won't work, but my favorite locally available watercolor postcards (called White Watson) which are 190g will work just fine. Postcards are called hagaki in Japanese.
That means I can make a digital sketch in Procreate on my iPad, print it on a postcard and color it with real watercolors. I can then trim it, punch holes, and put it in my ring binder.
In the print settings I found that setting the color to black and white will give me a pure black and white image that could pass for an original pencil or even ink sketch.
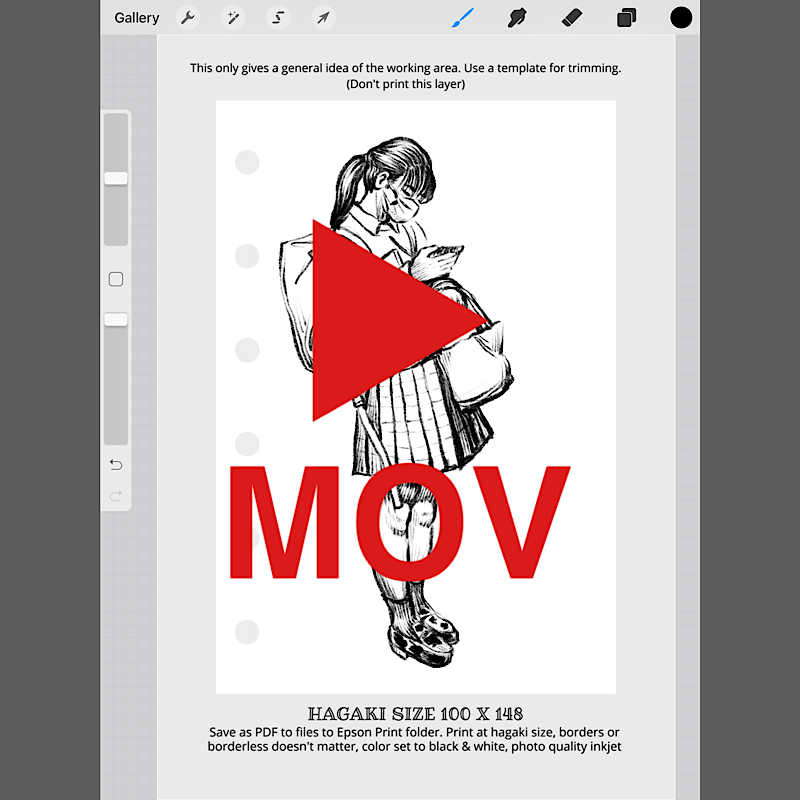
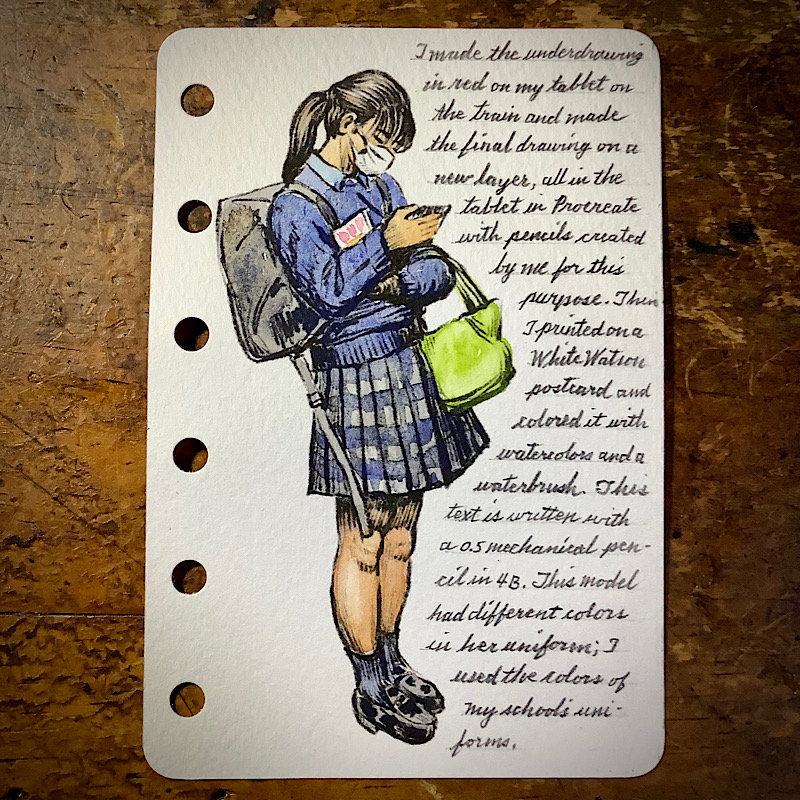
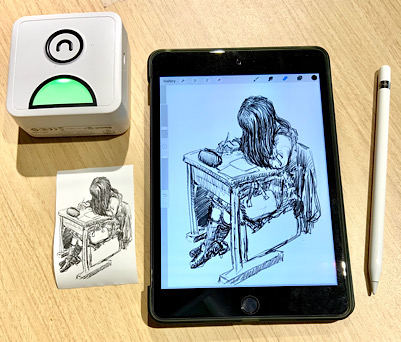
Here are photos of the process I used on a recent hybrid sketch. I drew the original drawing on my iPad Mini on the evening train and finished the sketch later at a desk. These images are square because I first posted them on my Instagram page.
Click on any image to see a bigger one. The one labeled MOV will take you to a time lapse video of the digital sketching process in Procreate.
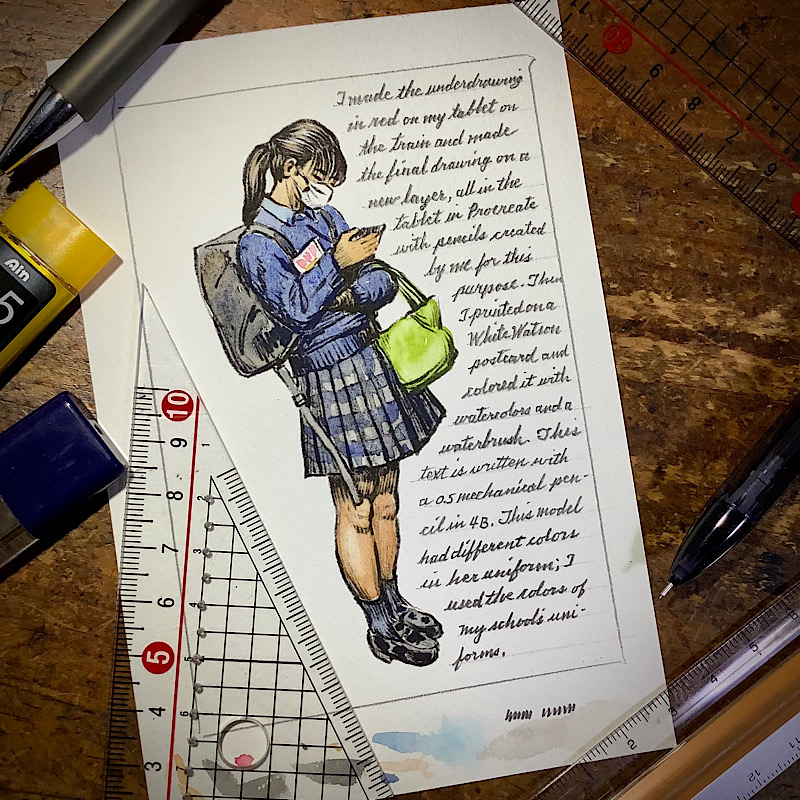
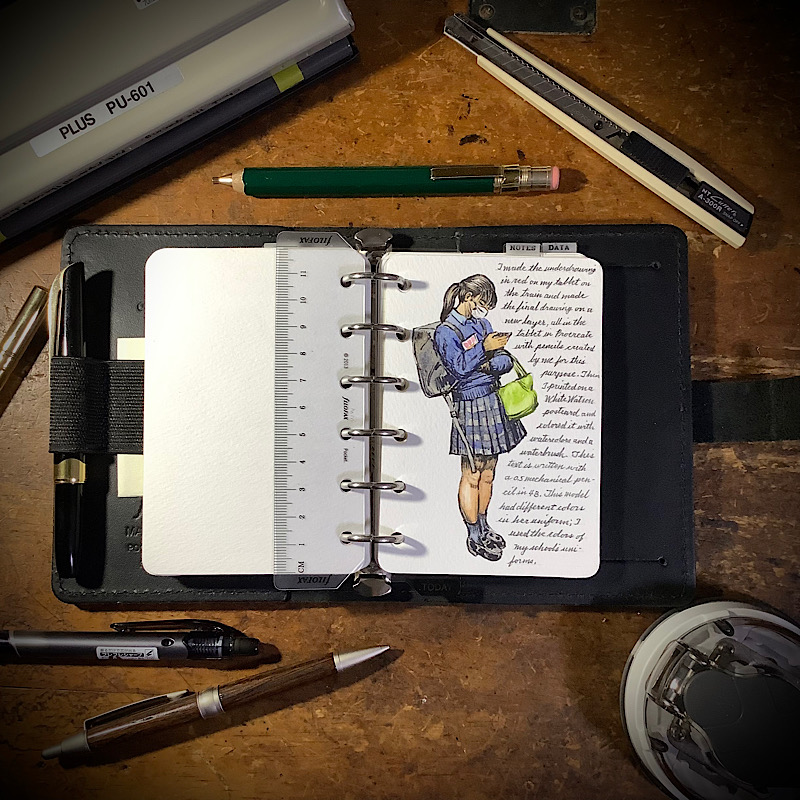
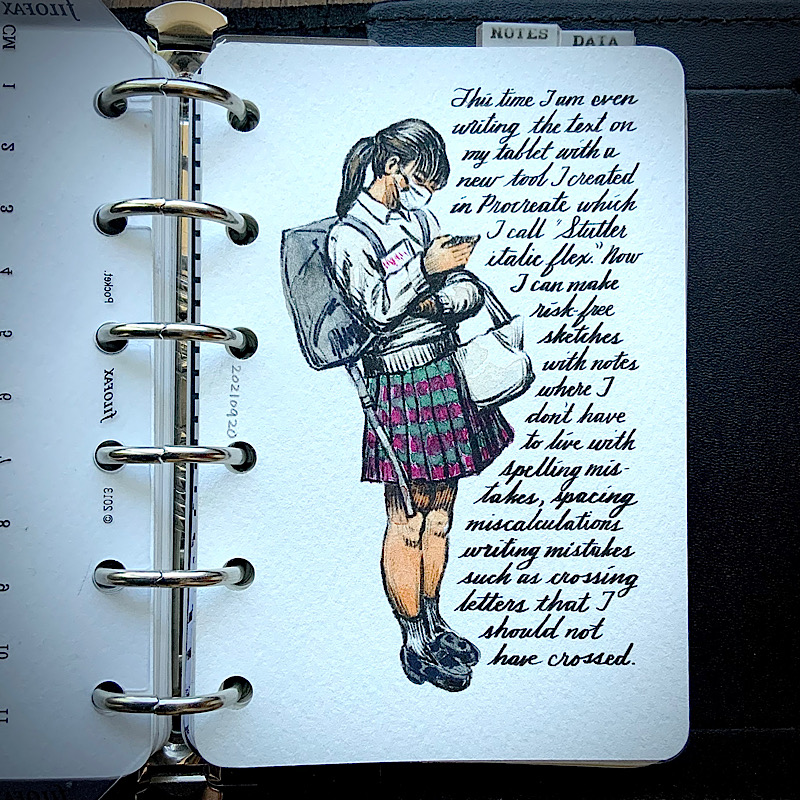
The last image uses the same sketch, but this time with text written in Procreate rather than directly on the paper with ink, and it has different colors in the uniform. That's the nice thing about this process; you can reuse the original black and white sketch as often as you like. You could even scan a regular pencil sketch to try different colors and preserve the original.
Here are some more digital hybrid sketches. As with the ones above, I made the line art in Procreate on my iPad Mini or iPad Pro, printed the line art onto watercolor postcards, and colored them with watercolors. I always make two of each sketch, one as a gift for the student who became my model, and one for me, which I trimmed, punched holes, and stored in my pocket ring binder. Click on any of these to see a larger image.
This idea of beginning a sketch digitally and finishing it with traditional media on paper is very appealing. When I open my notebook and see the finished product, it's nearly impossible to tell which sketches are partly digital and which ones were done from beginning to end with traditional media.
Now I'm free to choose either my iPad or my pencil and jotter, depending on the mood and circumstances. The results will be about the same and go in the same notebook.
Ironically, I'm not using the thermal printer much now. If I want to give student a sketch I can simply use this process and print it black and white on nice paper on the inkjet printer and maybe color it. But the thermal printer has served its purpose in initiating a series of events which moved my pendulum back towards analog (or hybrid digital/analog) sketching. So it was well worth it. I also have my former student to thank.
Note about Amazon links: If you click on a link and buy something at Amazon, a few pennies per dollar goes into my Amazon account, so instead of letting Amazon keep it all, you can pry a few pennies from their fingers make them share it with me. Any other vendor links I may put on this website are just for your convenience.